Making simple wire loops gives you practice to understand:
- what size loop you get from different areas on your round nose pliers
- how soft or hard the wire you are working with is
- how to make perfectly centered loops
- what size wire and loop combination will be strong enough as a connector loop for your project
- how long the wire tail needs to be for various sized loops
If you want to learn how easy it is to make wire jewelry, get my book Wire Wrap Jewelry Making for Beginners: Step by Step Projects for Beaded Designs. I tell you the tools, how to choose wire, the basic techniques and step by step pictures for 20 projects. (And don't forget to leave a review on Amazon to let me know how you liked it!)
If you want a taste of what's in the book, get started by learning to make a simple wire loop.
This is super easy and I guarantee you can do it!
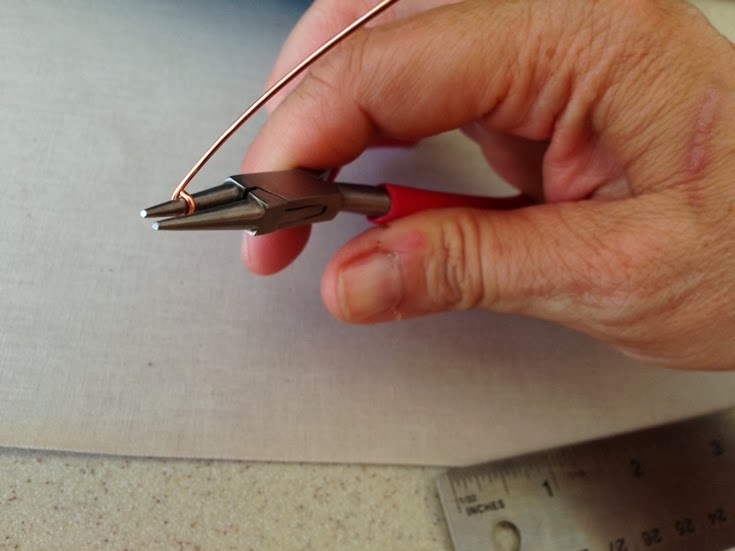
2. Using your round nose pliers, slide the tip of the wire between the two round jaws. You want the end of the wire to be between the jaws of the pliers, but not protruding over the edge. If you rub your finger across the top of the pliers where they grasp the wire - and you can feel the end of the wire, it's sticking out too much.
1. Cut a piece of 16g wire 3.5 inches long. Make sure the ends are flat and filed smooth.
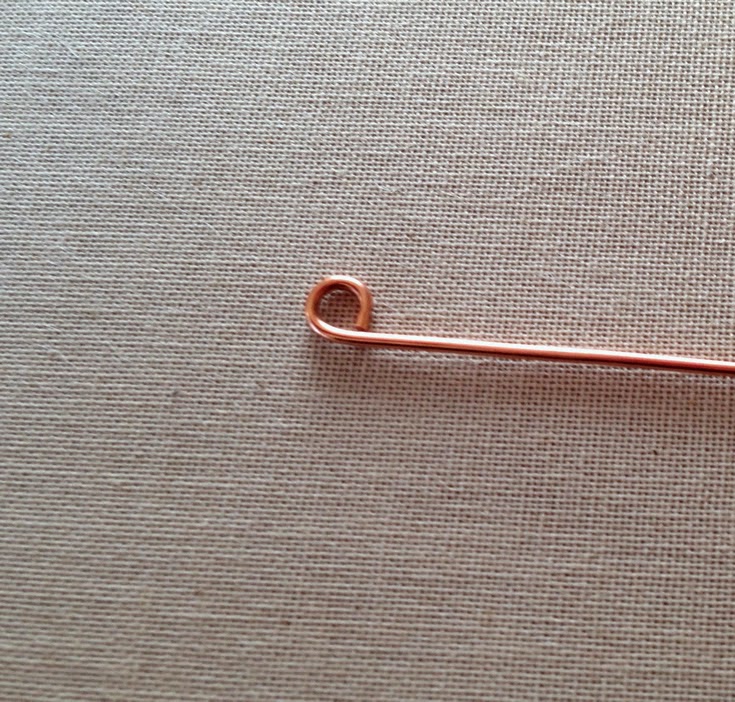
Make a loop on one end. Then turn your wire and make a loop on the other end facing the opposite direction.
*Just in case you want to make another ring like this or adjust the size of your ring, measure the size of the wire end to end at this point.
If you want a taste of what's in the book, get started by learning to make a simple wire loop.
This is super easy and I guarantee you can do it!
Even more important, once you learn to make loops and a few other wire bends, you can make all sorts of really nice jewelry.
Not just beads on headpins jewelry, although you'll want to try that too.
Most of all, remember that practice makes a huge difference in how your loops come out. Also, the tools can make a huge impact for a beginner. If tapered round nose pliers make it difficult for you to make consistent sized loops, read about how to improve your loops with six step bail making pliers and why I think they are great for beginners.
1. Using your wire flush cutters, cut a piece of 18 gauge wire (g) 5 inches long. Straighten it as much as you can by pulling it through your fingers to try and remove the natural curl the wire has coming off the coil. You can hold one end with the chain nose pliers to do this - but don't squeeze too hard!
* As a good habit, make sure the ends of your wire are flat, not pointed. It's also good to smooth the wire with a nail file or emery board just to start things off on the right foot.
* As a good habit, make sure the ends of your wire are flat, not pointed. It's also good to smooth the wire with a nail file or emery board just to start things off on the right foot.
2. Using your round nose pliers, slide the tip of the wire between the two round jaws. You want the end of the wire to be between the jaws of the pliers, but not protruding over the edge. If you rub your finger across the top of the pliers where they grasp the wire - and you can feel the end of the wire, it's sticking out too much.
3. Holding the wire firmly in the pliers and keeping it taut with the other hand, slowly wrap the wire around the barrel of the pliers by turning your pliers away from you. When you have wrapped about halfway, you may need to loosen your grip on the wire and turn the pliers towards you to continue the loop.
4. Your loop is complete when the end of the wire touches the base wire. If there is a gap, put your wires back in the loop and continue turning. If you went too far, you can try to un-wrap a little - but it doesn't usually keep a nice shape when you do that. It's actually easier to trim the extra piece off. But since this is practice - try both ways.
5. After making a loop, trim it off the end of the wire and practice again. Keep practicing until you are comfortable making loops and they come out round and a fairly consistent size. Remember you can make a mark on your pliers to make the loops the same size!
Now let's make a simple project using a wire loop.
Making an 'Infinity' wire ring
Make a loop on one end. Then turn your wire and make a loop on the other end facing the opposite direction.
*Just in case you want to make another ring like this or adjust the size of your ring, measure the size of the wire end to end at this point.
* If your loops are not lined up exactly, you can turn them slightly with your chain nose pliers. Be gentle grasping the loops or you will end up with dent marks from the pliers.
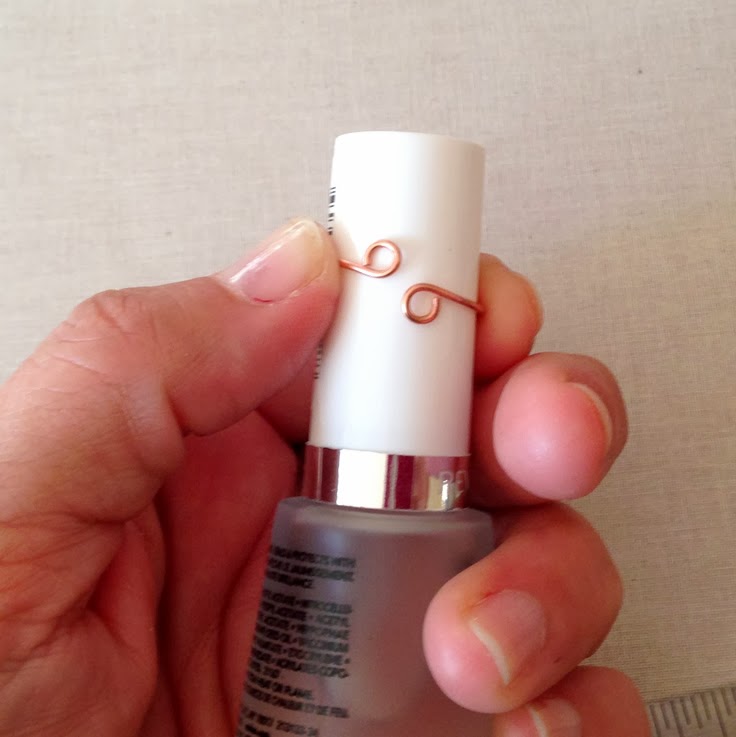
2. Find something round - about 3/4 inch in diameter. I am using the cap of a Revlon nail polish. Starting with a loop on one end, hold the wire firmly against the cap and wrap it around tightly. When it is firmly pressed against the cap from end to end, you can slide it off.
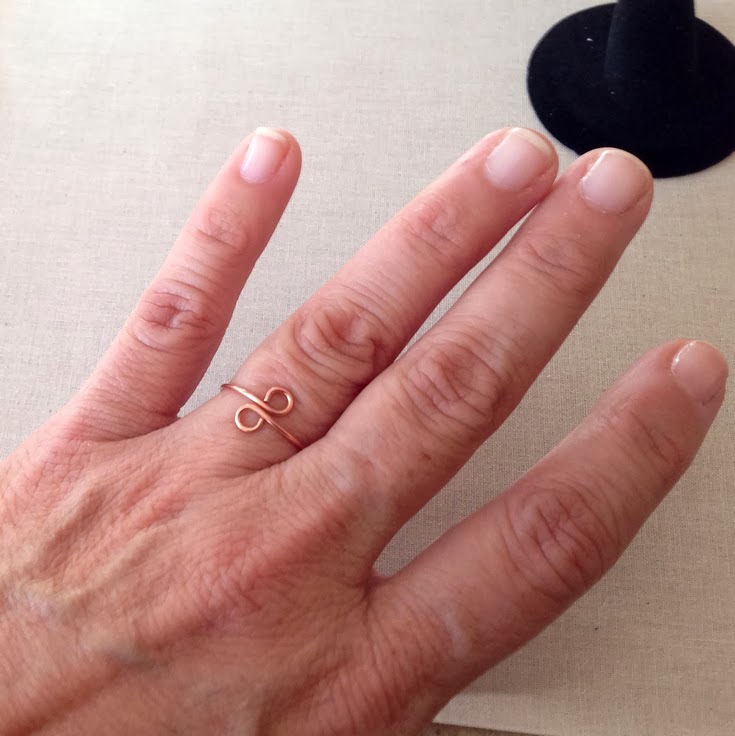
3. Adjust the wire to make your new ring fit. If the loops are not flat against your finger, you can use your chain nose pliers to adjust them. I like to make my loops touch so it looks like an infinity symbol.
4. You can also 'flip' your loops by pulling the bottom loop above the top loop. Now your ring has an entirely different look.
I hope your ring came out as good as mine!
Using the nail polish as a mandrel, and pushing my ends in close, my ring is about a size 7. If you need yours larger or smaller, you can make adjustments to the size wire you started with and also adjust the size mandrel you use.
There are 5 bead and wire ring projects in my book. And you can preview it on Amazon.


Thank you for sharing this! I'm gonna give this a try! Aloha
ReplyDeleteThank you for sharing the infinity ring. I gave it a try and it turned out beautiful :)
ReplyDeleteI just gave it a try . It turned out beautiful. Thank you for sharing the Infinity ring :)
ReplyDeleteFound your site thanks for sharing. Will give a try.
ReplyDelete