Not a hair out of place
I love hair accessories.
I grow my hair longer every few years just so I have a reason to wear them.
However, it's my lovely daughter modeling my project du jour - a headband made with wire and cats eye glass bead chips.
I've made this style headband before - but recently learned a different way to finish the elastic in the back.
That makes it worth making another and sharing it here. Also, did I mention I love hair accessories?
Supplies
2 Goody Ouchless No Metal Elastics
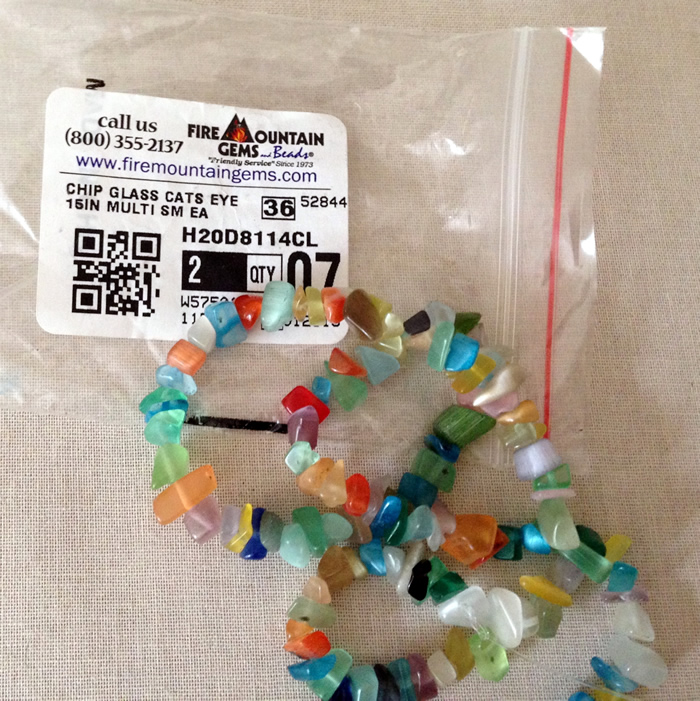
14-16 inch strand bead chips
about 40 inches 22g copper wire
The back of the headband is made with two hair elastics that are joined together. To join them, you basically pull the ends through each other to form a neat knot in the center. Overlap the two hair elastics.
Pull the end of each elastic through the other elastic. It will form a knot as you see above. Pull tightly and stretch the bands a little.
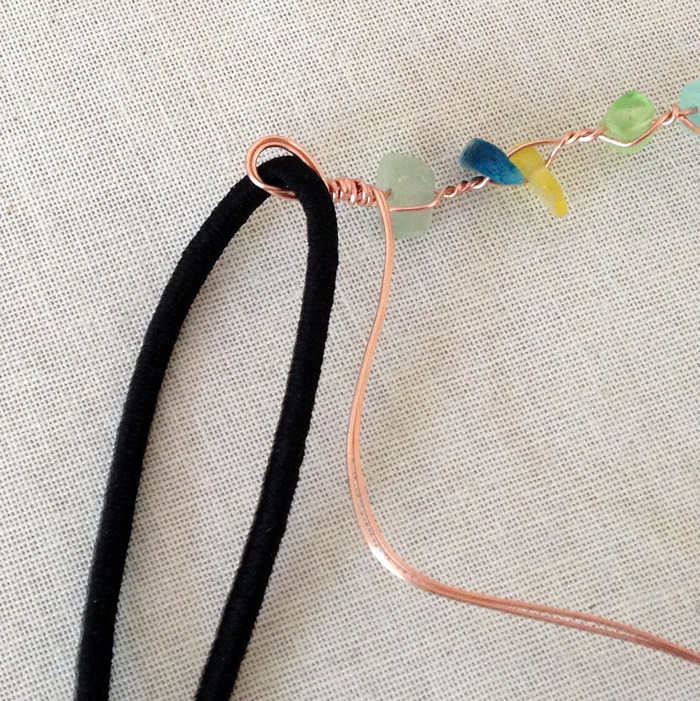
I used about 40 inches of 22 g wire for my headband. I had plenty extra. Attach the wire and twist to secure. Leave a loop so the elastic can slide within the wire loop.
Add a bead or two and twist a couple of times. Repeat.
Repeat adding more beads and twisting a small length of wire between to secure them. I am alternating one bead, and then one bead on each wire. If some beads are especially small, I throw on another.
As I twist and I add beads, I try to make sure that one wire is not becoming much shorter than the other. It's best if they stay close to even. I keep them even by alternating which wire I add the beads to and which one I twist around the other.
When your headband is the right size, loop the wire through the other end of the elastic and wrap to secure. Again, leave the loop open so the elastic can slide around. Make sure the headband is just a little snug with the elastic stretched a bit. The elastic tends to stretch over time.
Trim the ends of the wire and tuck them in and you've got your headband. Quick and easy.
14-16 inch strand bead chips
about 40 inches 22g copper wire
I used these multi-colored glass chips from Fire Mountain Gems for this headband. They are super inexpensive when they are on sale. I've also made headbands with tiger's eye chips and shell beads. Play around, because almost anything will work. This project is a great way to clear out some of your bead stash.
The back of the headband is made with two hair elastics that are joined together. To join them, you basically pull the ends through each other to form a neat knot in the center. Overlap the two hair elastics.
Pull the end of each elastic through the other elastic. It will form a knot as you see above. Pull tightly and stretch the bands a little.
I used about 40 inches of 22 g wire for my headband. I had plenty extra. Attach the wire and twist to secure. Leave a loop so the elastic can slide within the wire loop.
Add a bead or two and twist a couple of times. Repeat.
Repeat adding more beads and twisting a small length of wire between to secure them. I am alternating one bead, and then one bead on each wire. If some beads are especially small, I throw on another.
As I twist and I add beads, I try to make sure that one wire is not becoming much shorter than the other. It's best if they stay close to even. I keep them even by alternating which wire I add the beads to and which one I twist around the other.
When your headband is the right size, loop the wire through the other end of the elastic and wrap to secure. Again, leave the loop open so the elastic can slide around. Make sure the headband is just a little snug with the elastic stretched a bit. The elastic tends to stretch over time.
Trim the ends of the wire and tuck them in and you've got your headband. Quick and easy.
And oh! so pretty!
And, yes, it's comfortable too! The wire is rigid enough to hold your hair in place, but as long as you've tucked the ends well - does not scratch.
If you want to experiment - try using only one elastic in the back and more wire/beads. Then you can wrap it around your wrist a few times and wear it as a bracelet when it's not holding your hair back.


I realize that this is an old post but I just found your blog and had to comment. I love this headband!! It's so simple but could make a huge impact depending on the beads used.
ReplyDeleteThank you! These are easy to make and very versatile. I had forgotten about this project, but maybe I'll need to make a few.
Delete