Save Time Making Jewelry
What if you could make four pieces of wire jewelry in slightly more time than it normally takes you to make one?
Silly question, right?
For example, this week I'm working on some different methods to add beads to wire heart shaped frames. My focus right now is on the beading part, not how to make the wire heart frames, but I prefer handmade frames to store bought.
I decided to see if I could speed up the process and make four frames at once.
And guess what? It works!!
Here's how I did it using the steps in the free tutorial I published earlier this week on how to make a wire heart frame.
First, I straightened my wire and cut four pieces the same size. I taped both ends together so the wire lays flat using blue painter's tape. I like the blue painters tape because it holds well, but the glue comes off easier than regular masking tape.
I used fve inches of 16g wire because I wanted a little bit of extra wire to work with (you'll see why later!)
I used fve inches of 16g wire because I wanted a little bit of extra wire to work with (you'll see why later!)
Now, I make the wire heart frames using all four wires just like I did with one. This will only work if you are using a mandrel of consistent size like these Multi-step Ring Looping Plier
. Standard round nose pliers will not work.
I follow all the same steps in the free wire heart frame tutorial, except I can't pinch the center of the hearts. I tried, but it's making the wires separate, so I decided to leave that step for the end.
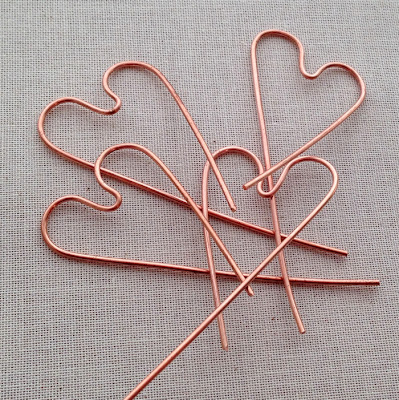
Once I remove the tape from the wire, I have four very similar wire heart shapes that just need a bit of refining and finishing.
I pinch the center of each heart individually.
Touch up the heart shape with the Multi-step Ring Looping Plier
.
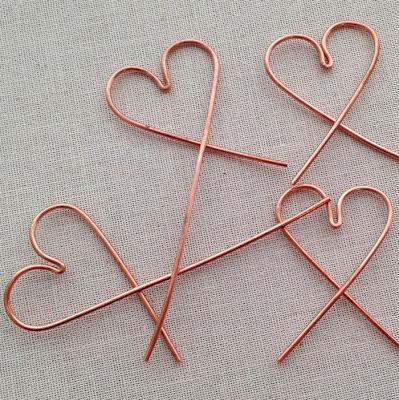
And in a little more time than it took me to create one heart, I now have four!
You don't need to make four at a time like I did either. If you are making earrings, try making both at the same time. This works really well for making ear wires that match.
Making the Wire Frames Match
Another nice feature, besides the time savings, is that all of these hearts are close to the same size and shape. That makes these wire frames perfect for earrings - when you really need the two wire shapes to match. It also makes this process perfect for higher volume production of your handcrafted wire and bead masterpieces.You don't need to make four at a time like I did either. If you are making earrings, try making both at the same time. This works really well for making ear wires that match.
Wire Heart Design Variations
I mentioned that I started with a longer piece of wire to make these hearts.
One reason was that I thought it would be easier to grip and manipulate the wire. Another reason is that I wanted to try some other finishing techniques for the hearts.
One reason was that I thought it would be easier to grip and manipulate the wire. Another reason is that I wanted to try some other finishing techniques for the hearts.
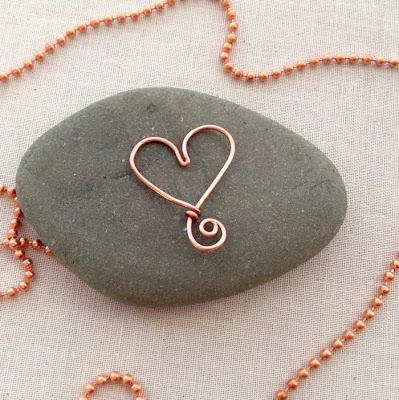
For this frame, I wrapped the short tail around the wire to close the heart and added a decorative swirl with the remaining 1 inch of wire.
The swirl adds some weight to the bottom and also gives me the option of adding a dangle when I start adding beads to the wire frame.
And speaking of adding beads to the frame, here's a wire heart frame that is nearly finished.
I used 24g copper wire to attach red Toho 6/0 beads to the outside edge. The bright copper looked a little strange with the silver lined seed beads, so I used liver of sulfur patina gel to oxidize it to a darker color.
I used 24g copper wire to attach red Toho 6/0 beads to the outside edge. The bright copper looked a little strange with the silver lined seed beads, so I used liver of sulfur patina gel to oxidize it to a darker color.
More Heart Frame Jewelry Designs
I'm planning to wire or stitch beads to more hearts this week, as well as take some pictures of the techniques I use - because there are lots of different methods to use to add the beads.
If you missed the detailed step by step to make the frames, you can see it here: Free Tutorial to Make a Wire Heart Shape Frame for Beading.
My Jewelry and Beadwork Projects Delivered to You
By email: You can sign up by providing your email and you will be notified of new blog posts plus special offers. Make sure you confirm your subscription request by clicking the link in the email.
By following me on Pinterest: Lisa Yang Jewelry on Pinterest
By subscribing on YouTube: Lisa Yang Jewelry on YouTube
And Instagram: @lisayangjewelry


Great tip, Lisa! I can only do 2 at a time with just the bail forming pliers. Will share on my blog!!
ReplyDeleteBeautifully done! Great info in clear and concise language along with terrific pics. Thanks!
ReplyDeletevery nice
ReplyDeleteGreat tips, Very well done, looks great.
ReplyDeleteJust starting to make wire jewelry, found your idea very helpful. Thank you.
ReplyDeletegreat technique!
ReplyDeleteThank you for the tip!! I love sharing time saving tips!
ReplyDeleteThank you for your help. Fantastic video, extremely helpful.
ReplyDelete