A wire jig was one of my early tool purchases. My first one was the purple plastic jig that you buy at the craft store. I used it right away and guess what?
It was a nightmare!
- The pegs kept popping out when I was trying to wrap the wire around it.
- My curves were not smoooth.
- I didn't realize you had to sometimes remove an item from the jig to flip it over to wrap the wire on the other side of the project.
- And last, I probably wasn't using the right type of wire.
Half hard wire has a lot of spring and you can bend it into shape, only to have it spring back to a larger size once you remove it from the jig pegs. And yeah, I didn't read the directions either.
After a few brief tries, I put it aside and threw the wire in the scrap jar. I can't recall anything good coming from it. It looks like I saved the pegs from that jig, but not the base.
At some point, I purchased a 'real' jig, from wigjig.com. Back when I started making jewelry, they had one of the most informative wire jewelry making sites around with lots of free tutorials and pictures. They still have that, and if you've never looked around there, I highly recommend browsing. The content is still very good, although it does seem a little dated in the way that it's presented. Oddly enough though, if you want to buy a wigjig or wigjig pegs, it looks like there is a larger selection on Amazon.
So this week. I knew I wanted to make a double heart ring DIY for Valentine's Day to publish at The Spruce (click the link for non-jig tutorial). It is similar to the wire heart ring instructions I published here in 2014. (Wow - time flies - huh?!). As I was making my first couple of rings, I had difficulty making the bends and loops of the hearts even. Well - "what about using a jig?" popped into my mind.
After searching my garage workshop for hours (literally) only to find my jig that was actually sitting in a baggie on top of the workbench staring at me the whole time, I got a chance to give it a try. I was very annoyed with myself, particularly since my first New Year's resolution was to organize my jewelry making supplies - but that's a story for another day
I highly doubt that my jig suddenly became better over time.
I'm sure I have learned more about what size and type of wire to use, where to wrap on the pegs, how to pull the wire, etc. So, it was all good, and with my new knowledge, the jig was much faster than my pliers and gave far more even results. Actually, what I like most was the size of the hearts using the jig. It helped me understand where to place my wire on the pliers to get the right size when I wanted to try it that way again.
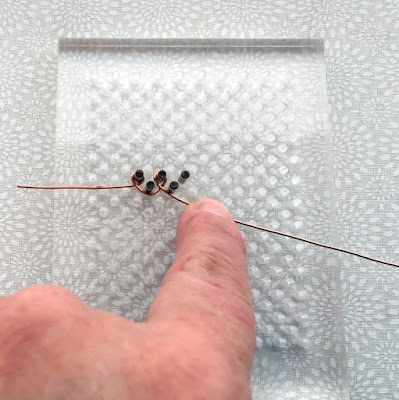
Here's my jig setup. After reading some instructions at wigjig, I learned that they recommend you add the pegs as you go. Ya, I didn't do that, and it worked anyway.
From a materials perspective, to make this ring you will need seven to eight inches of 20g wire. I tried it with 20g copper (a little softer) and 18g brass too. They all worked. You will need flat nose pliers, flush cutters, a ring mandrel or other round item to form the ring around and your jig. You might also want a bench block and hammer to harden the design.
Set up your jig pegs as shown. It requires a minimum of three pegs. I think five was ideal so I could make both hearts at once.
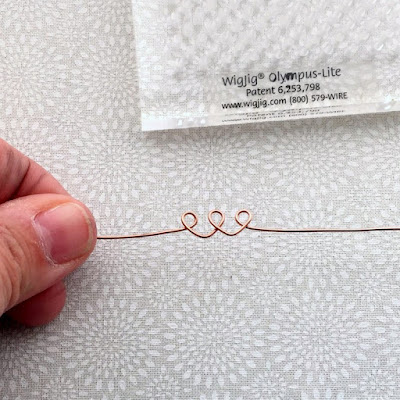
Holding the end firmly, make a loop around the first peg, starting to wrap about 1.25 inches from one end of the wire. Push the loop all the way down flush against the jig and make sure the loop is tight around the peg. Make a full circle around the peg and pull the wire so it is touching the next peg. Make sure everything is tight before going on to the next step.
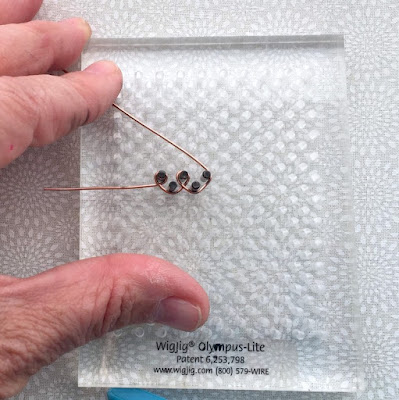
Pull the wire up around the next peg going toward the top peg to make a V. Push the wire all the down the peg so it is against the jig.
Time to make another loop! Holding the wire wraps in place, loop the wire around the peg from the right side around to the left, going down towards the next peg. Pull so the wire is tight around the pegs and push the wire down against the jig. This is the most difficult loop since the wire will want to slip off the peg. Be patient.
Now repeat the steps to wrap around the bottom peg to make a V.
DON'T WRAP THE NEXT LOOP yet!
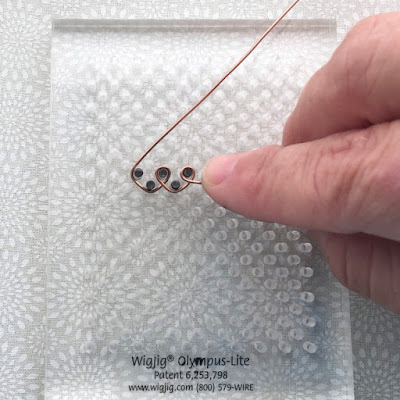
This is where you need to remove the work, and flip it over so the wires will be on the same plane. Gently nudge the loops up off of the jig being careful to maintain the shape.
Flip the wire shape over and place it back on the pegs. You are now set to wrap around the peg on the left side, instead of the right.
Proceed as before, wrapping the wire on the left side of the peg, over the top and right side and ending up with the wire heading straight out to the left side.
Use the long piece of wire to make the ring by wrapping it around a mandrel, passing it under the double hearts to the other side. Wrap the wire to secure and then do the same with the shorter piece of wire on the other side. (For this part, there are detailed instructions on The Spruce article starting on step 8).
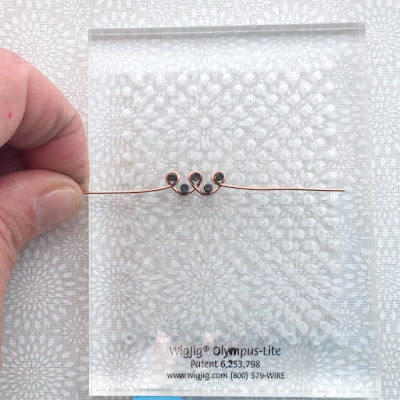
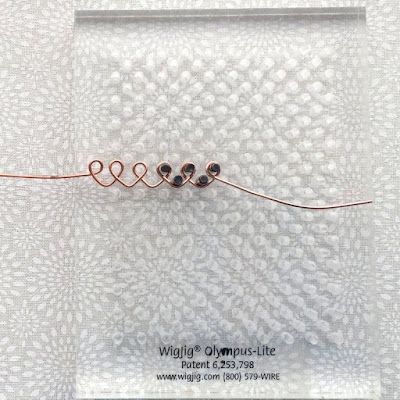
Now, just because I could, I decided to see what happens if I keep making hearts. So I put the wire back on the jig working towards the right again.
Finishing the third heart, I need to remove the wire from the jig and flip the work over to keep the wires on the right side of the work. But aside from that, I just keep going.
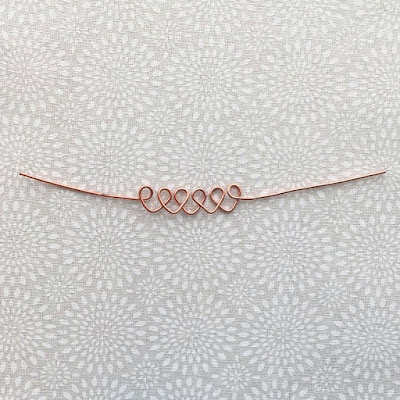
And I came up with this nice string of hearts that needs a little adjusting, some hammering and can make a nice pendant or possibly even be part of a bracelet.
And last but not least, you may be wondering which was the easier way to make the hearts - traditional wire tools or a jig?
The jig definitely made it easier to make the hearts even size and to get an idea of the correct size to make them. Once I got that down from making them on the jig, it made it easier for me to make them using the pliers than it was originally, since I could mark the place on the pliers to make the loops and bends and it came out more even. Overall though, the jig is quicker and easier. Making the row of hearts would never come out that even with pliers.
Update 2/4/18: I took some orders for double heart rings for Valentine's Day. Look how pretty they are in sterling silver and gold filled!
And when I made these, I realized how important it is to tumble polish these rings when you are done. They came out bright and shiny plus removed little scratchy burrs and hardened the whole ring. I also tumbled the string of copper hearts and used that for a bracelet center.
To find out about my latest posts, please follow me on social media or sign up for email notifications of new projects. Sign up here.






I, too, buy tools because I might want to try something someday. Somewhere I have a bunch of Kumihimo disks and a Sizzix embossing machine, as well as my very own untouched wire jig.
ReplyDeleteOh good - it's not just me!
DeleteSweet! Love how they turned out!
ReplyDeleteWe all are guilty of buying tools or materials that turn into a hoard. It feels good when you put them to good use, like you did!
ReplyDeleteThis comment has been removed by the author.
ReplyDeleteLisa, how do you tumble these? In a rock tumbler? Do you have any links for videos or tutorials on how to tumble jewelry?
ReplyDeleteI too have a tool or two *ahem* or maybe three that is kicking around here somewhere.
I use a rotary (rock) tumbler from Harbor Freight with mixed stainless steel tumbling shot (balls and pins). I add water half way up and a little dish soap. I only tumble for about an hour - but the difference is incredible. I'll make a note to write about it the next time I use it.
DeleteI have a Loritone 2 barrel tumbler and have been using both barrels for tumbling rocks. Can I use one of the barrels, once I've cleaned it well, for wire pieces? Thanks for a great tutorial. I have a wire jig sitting in my jewelry supply drawers and it taunts me every time I open that particular drawer. Along with at least 4 other tools/drawer mates.
ReplyDeleteYes. You can use your Loritone tumbler for jewelry. I don't have a double barrel, mine in a single barrel and I've used it for jewelry for years now. However, I'll occasionally use it for beach glass and small stones I find at the beach ~ geez, I wonder if you can tell what my next favorite thing to do is next to making jewelry~ I add enough water to cover the jewelry (or whatever you're tumbling) and add a couple of drops of Dawn dishwashing soap. Then, depending on what it is I'm tumbling, (if it's silver earrings) I'll tumble for appx an hour or two. Hope this helps. I've been making jewelry for several years and own my own business. Thank you for the opportunity to reply. TLS
ReplyDelete