This free brick stitch beaded heart tutorial is perfect for learning a new beadwork stitch.
Brick stitch, along with peyote stitch, is one of the most popular beadwork stitches. This heart pattern is great for beginners because, in addition to practicing the basic brick stitch, you learn fundamental techniques like increasing and decreasing brick stitch on the beginning and ends of rows.
Using this tutorial, you'll learn how to make these beaded brick stitch heart charms plus follow the heart beadwork pattern I used to make them.
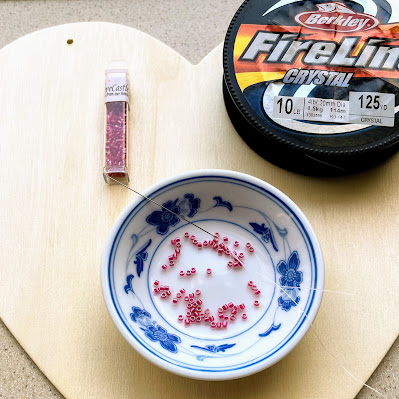
You will need the following supplies to get started:
- a beading needle. Tulip beading needles are my favorite
- FireLine or similar fishing line type thread are easiest for a beginning beader
- Miyuki Delica or other similar cylinder beads
- The links above are affiliate links to Amazon. If you purchase using one of these links I will receive a small commission at no additional cost to you.
I make beaded hearts with a variety of beading threads but fishing line types of thread result in a stiffer finished component. It also does not split as easy when you are stitching as nylon threads like Nymo.
For more information on bead thread selection and types, you may find this article on finding the best thread for beading helpful.
This tutorial uses FireLine 10 lb weight in Crystal color. I'm using a thicker than normal thread because the beads are Miyuki size 10 delica beads - which have a substantially larger hole than a size 11. The bead color is Sparkling Rose Lined Crystal (DBM-914). If you are just learning brick stitch, the size 10 delica beads are fabulous to work with.
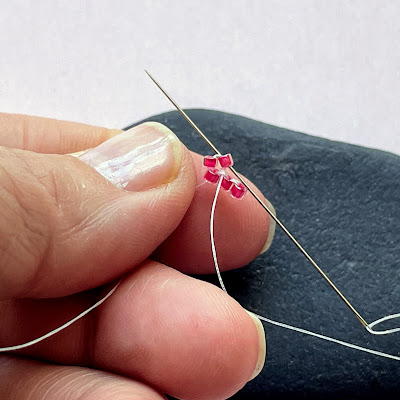
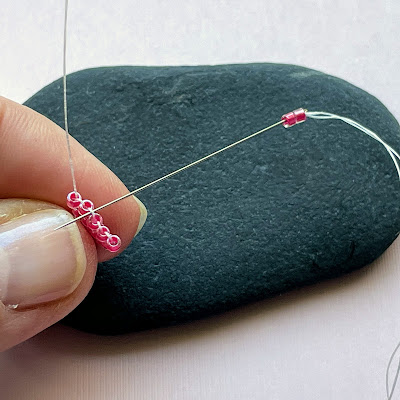
One way to start flat brick stitch is with a row of ladder stitch. Pick up two beads, go back through the first bead in the same direction as you originally did, and then through the new bead again.
There is an easier way to start brick stitch which is like using a peyote stitch to get started.
I like the alternate method to start brick stitch better for these hearts because you stitch two rows at one time, making it much easier to hold on to your project. It's good to learn both methods, though, and then decide which one works best for you and the beading project you are making.
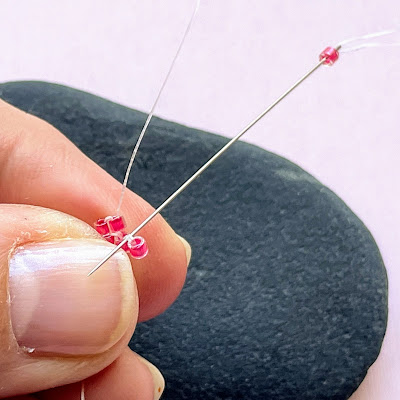
Repeat these steps to add a third bead to the ladder.
After adding the third bead, I go back through the second and first beads to tighten the row and move the thread so my tail and working thread end aligned. This will make it easier to add a chain or jump rings to hang the charm.
With your thread aligned like the picture above, you are ready to start brick stitching.
If you didn't align your thread like this - it doesn't matter - you can weave the thread around when you are done beading the heart.
Pull the thread through and align the beads so they sit side by side.
Stitch up through the second bead to complete the brick stitch.
Pull the thread through and make sure the new beads are stacked like bricks on the first row.
Of course, that is why it is called 'brick stitch' because of the stacking alignment similar to how bricks are set.
Pick up one bead for the next stitch and repeat the process.
Put your needle under the thread bridge between the second and third beads on the prior row, then stitch up through the bead.
Adding the fourth bead on the row is increasing the width or the row, so it is called doing an increase.
To increase at the end of a row of brick stitch, you will re-use the thread bridge that you used for the last bead.
Since the beads are small, you won't be able to see where to place your needle very well, but you need to try and put it in the space between the beads and lift it up so it sits under the bridge between the beads.
Sometimes if you try to slip under the bridge, you will stitch into the threads. This can split and weaken them (and also makes it really hard to 'undo' a stitch).
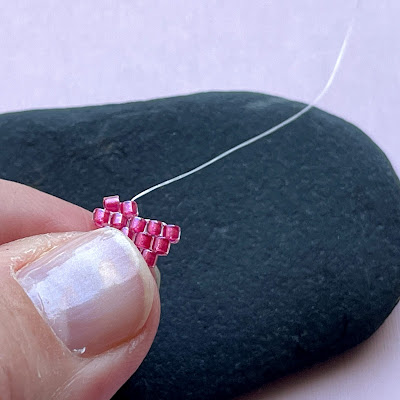
The third row is worked just like the second. Pick up two beads and stitch under the first bridge and up through the second bead, then add one bead at a time. For the last stitch increase, go under the last thread bridge a second time.
A quick note regarding the direction you stitch in. I am right handed and I find it easiest to brick stitch from left to right.
For the row above, I went from right to left and I realized my left hand fingers were getting in the way of making the stitch. That means, at the end of every row, I typically turn my beadwork around and work in the same direction for each row. I hope that helps someone.
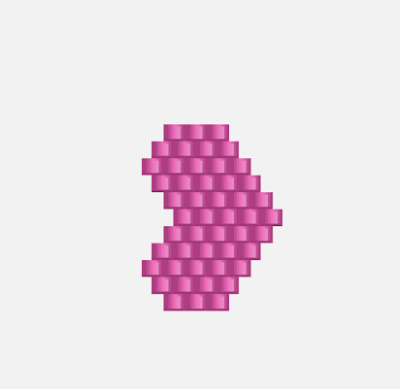
At this point, you might like to see the pattern that your working.
It helps to follow along on the pattern, because now you'll start doing a decrease on the end of one row and an increase on the other end of the row. You can read the pattern from the top or bottom. We have just completed the third row.
To start the fourth row, there is a brick stitch decrease.
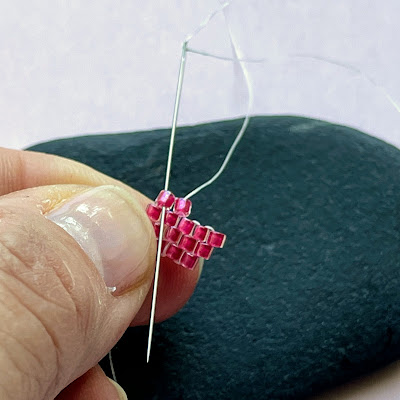
To decrease, you will still pick up two beads to start the row, but instead of stitching under the first bridge, put your needle under the second thread bridge of the prior row and then go up through the second bead.
Similar to the increase that happens automatically at the beginning of each row, a decrease will happen naturally at the end of the row if you don't stitch under the last bridge two times.
When we talk about decreasing in brick stitch, it often pertains to the front of the row, where you need to consciously skip the first thread bridge and go under the second one to make the beadwork decrease in size.
When you do a decrease and pull the thread taut, you may notice that the first bead doesn't sit neatly tucked in like it has in prior rows. It is a slanted.
To put it into alignment, I use a locking stitch. A locking stitch in brick stitch is basically a ladder stitch to keep the first two beads aligned.
The only time I use a locking stitch is when I am doing a decrease at the start of a row.
The locking stitch is optional - but depending on the size and type of beads, the slant of the beads can be really noticeable and throw your pattern out of whack.
I almost always use one - and I can notice when people don't, especially on diamond shaped or triangle brick stitch earrings.
Now you continue to bead the rest of the row, ending the row with an increase like the previous ones.
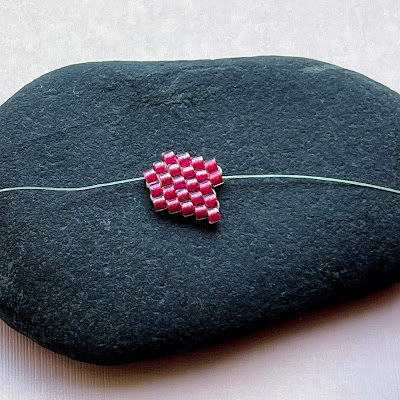
Following the shape is a bit challenging, but you just need to remember one side of the heart is increasing and then decreasing to reach the middle while the other side is consistently increasing to come to a point.
The beading program I use provides a word chart as well as the beading diagram, but I think it is difficult to follow for brick stitch without telling you which thread bridge you are stitching in to. (i.e. first or second), which it doesn't do.
My suggestion is to follow the shape of the diagram and count the rows to verify whether you should be increasing or decreasing. Many people mark off each row on the pattern when it is complete to keep their place.
I hope you were able to follow this!
It was a little more challenging for me to write than I expected. The last step will be to decide how to tie off your working cord and tail. This will depend on what type of jewelry you are making.

If you made it this far, please view this next tutorial on how to add connector rings to your beaded charm and use them to make jewelry.
Please follow or like my social media pages to keep up with my projects and know when I've published new ones.
Get my newsletter: Sign up by providing your email and you will be notified of new blog posts plus special offers. Make sure you confirm your subscription request by clicking the link in the email.
Like my page on Facebook: Lisa Yang Jewelry on Facebook
Follow me on Pinterest: Lisa Yang Jewelry on Pinterest
Subscribe on YouTube: Lisa Yang Jewelry on YouTube
My Instagram: @lisayangjewelry

![Brick Stitch Beaded Heart Charm [Beginner Beadwork Tutorial] brick stitch heart charm](https://blogger.googleusercontent.com/img/b/R29vZ2xl/AVvXsEjPwoTpdzPIbysxRE6_u47z8qC3zxRfKy_RdXdb6tHKj3jIHD3iv8W54QGbKfjZK2Fbr1uYrBoJo1xn_h_iXATW0wFKqG5gdqMBakHmh0AwBm_6pDP8Yi_IOnhWlQvwBUkHGMEUSlQXxreiqAfx17grnGF6jNai_Baz2VRGnBDfFO2P6OxoyB3W9MMUbQ/w426-h640/brick%20stitch%20heart%20tutorial%20pattern.jpg)








No comments:
Post a Comment